Installing Nexus Repository on Kubernetes
Firstly we will install the storage class, because we must keep the our data and image in sperated place. After setup of the storage class we will install the nexus application. You can find the source yaml code on the our github hafifbilgiler repository.
We will install Longhorn storage for our environment. We can find the a lot of information on longhorn offical web site.
LONGHORN INSTALLATION
Step1:
Check the system for prerequest packages with command below. If you get output about neccessary packages, you sould install the packages for your environment.
curl -sSfL https://raw.githubusercontent.com/longhorn/longhorn/v1.2.4/scripts/environment_check.sh | bashStep2:
Obtain the yaml file to create or change the longhorn resources with ArgoCD. Also you can use the “kubectl” command to install resources of longhorn without using argocd.
https://raw.githubusercontent.com/longhorn/longhorn/v1.2.4/deploy/longhorn.yamlI have been installed the longhorn storage class on linux centos machine. So, long horn needs the some packages to complete the installation. You can find explain of needed packages on this url.
yum --setopt=tsflags=noscripts install iscsi-initiator-utils
systemctl enable iscsid
systemctl start iscsid
kubectl apply -f https://raw.githubusercontent.com/longhorn/longhorn/v1.2.4/deploy/prerequisite/longhorn-iscsi-installation.yamlyum install nfs-utils
kubectl apply -f https://raw.githubusercontent.com/longhorn/longhorn/v1.2.4/deploy/prerequisite/longhorn-nfs-installation.yamlAfter the deployment , we can check pod status with command below.
kubectl get pod | grep longhorn-nfs-installationStep3:
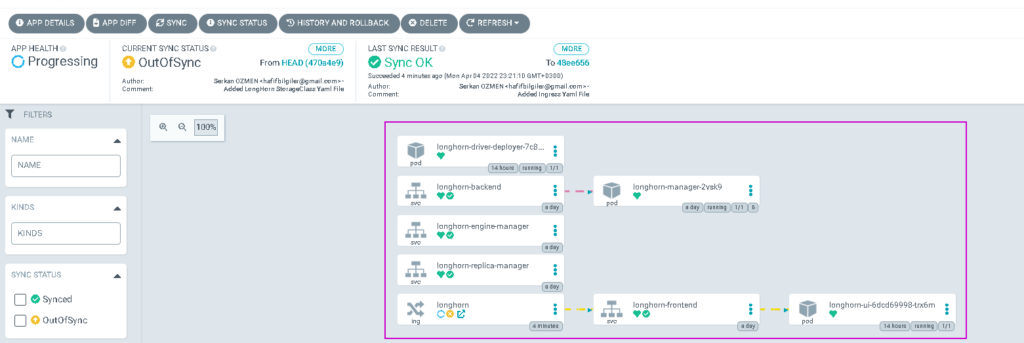
After we can create the application on argocd and it should be seems like below picture. Also I have been obtained the yaml file and i pushed hafifbilgiler repository. You can use my repository to create application.
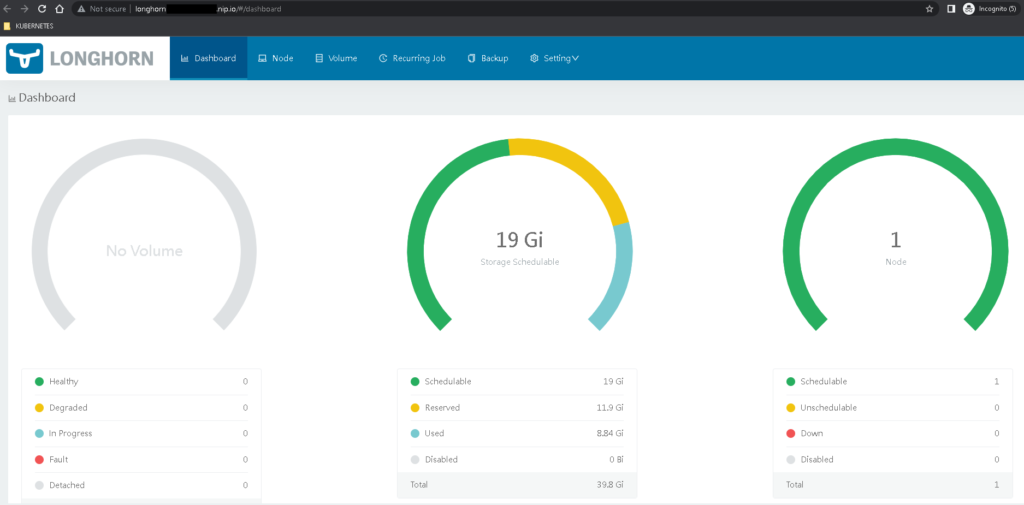
Then we can access the dashboard with ingress url. If you got the yaml file from hafifbilgiler repository you should change the url of longhorn, on the ingress yaml file.
Then we will create the storage class to use our projects.
kubectl create -f https://raw.githubusercontent.com/longhorn/longhorn/v1.2.4/examples/storageclass.yamlNEXUS INSTALLATION
We will use the argocd to create nexus application, you can find source yaml code in this repository.
Step1:
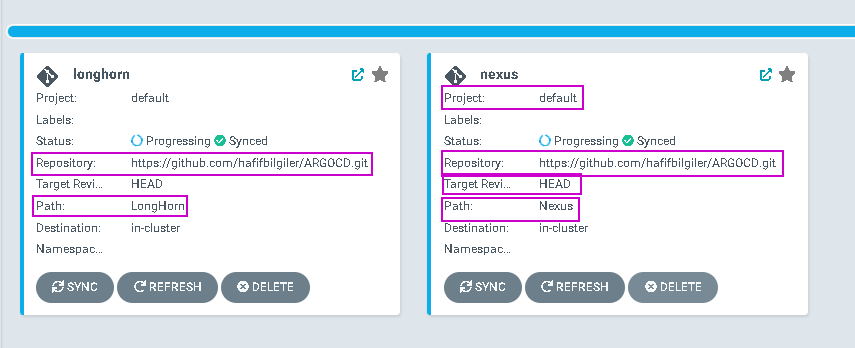
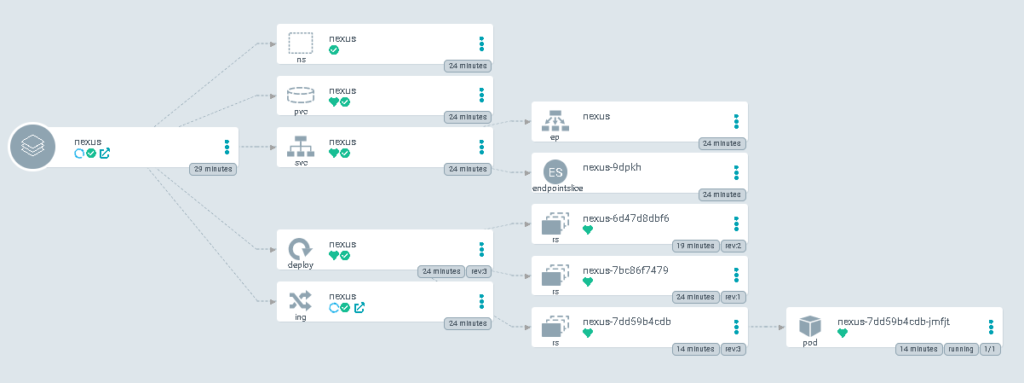
Add application on argocd and choose the ” https://github.com/hafifbilgiler/ARGOCD.git” repository and add “Nexus” in the path field. Your application should seems like below.
Step2:
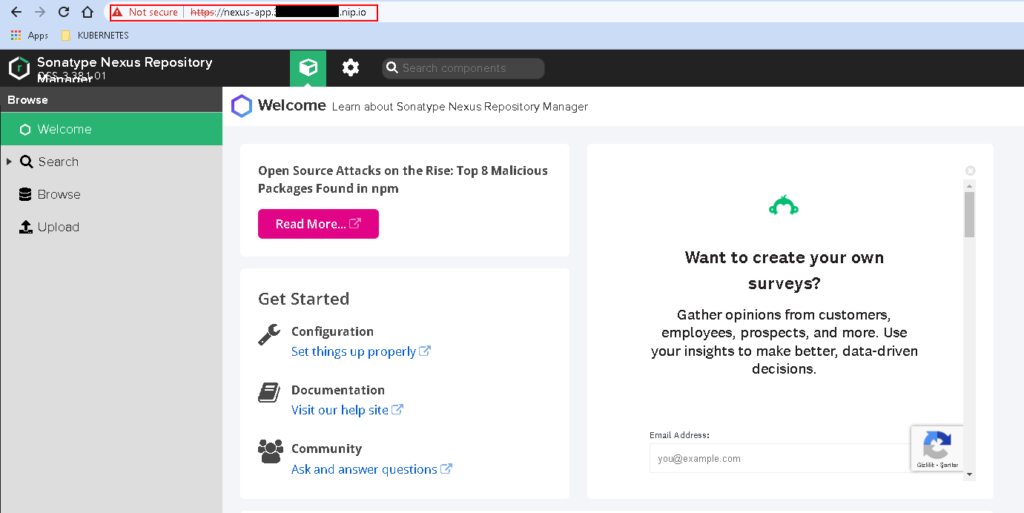
Try to connect for nexus with ingress address. I have been used nip.io domain server to solving my worker node ip address and I was added my worker node ip address in my ingress definition yaml file. You should change the ip address in nexus ingress yaml file.
kubectl get ing -n nexus
NOTE:
If you want to use self signed certificate to access nexus repository , you can follow the steps below;
LIGHTINFO: We can keep the our private data like password with using the secret resources. But it is not the safe way to keep private data. Because, when you try to use “kubectl describe secret ” command, you can access and decode your data with base64 algorithm.
openssl req -x509 -nodes -days 365 -newkey rsa:2048 -keyout /tmp/tls_key.key -out /tmp/tls_crt.crt -subj "/CN=nexus-app.your-node-ip.nip.io"kubectl create secret tls nexus-secret4ssl -n nexus --cert=/tmp/tls_crt.crt --key=/tmp/tls_key.keyThen we can use the secret definition on the ingress yaml file like below.
apiVersion: networking.k8s.io/v1
kind: Ingress
metadata:
  namespace: nexus
  name: nexus
spec:
  ingressClassName: nginx
  rules:
  - host: nexus-app.your-node-ip.nip.io
    http:
      paths:
      - backend:
          service:
            name: nexus
            port:
              number: 8081
        path: /
        pathType: Prefix
  tls:
  - hosts:
    - nexus-app.your-node-ip.nip.io
    secretName: nexus-secret4ssl
status:
  loadBalancer: {}
Step3:
Obtain the default admin password and try to login nexus application.
POD_NEXUS=$(kubectl get pods -n nexus -l app=nexus -o jsonpath='{range.items[0]}{.metadata.name}')
PASSWORD=$(kubectl exec -it $POD_NEXUS -n nexus -- cat /nexus-data/admin.password)
echo $PASSWORD
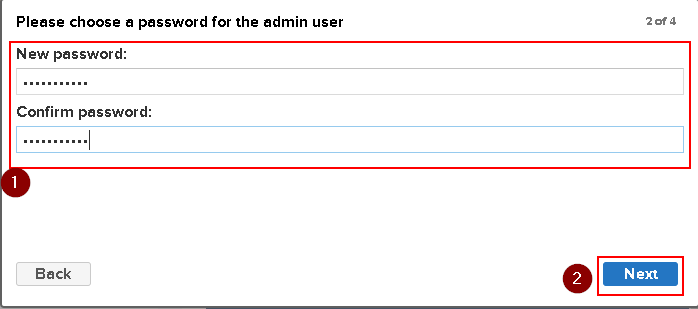
After login you must change the default admin password.

Step3:
Then, We can create new private repository on the nexus for kubernetes. To create repository :
LINK